Photo of new hatch boards

classic Classic list List threaded Threaded
10 messages Options
Reply | Threaded
Open this post in threaded view
|

Photo of new hatch boards

Lynn Israel
New hatch boards
Reply | Threaded
Open this post in threaded view
|

Re: Photo of new hatch boards

Glenn Thomson
That's a nice cover Lynn, you did a good job.  I made a tinted 3 piece one last year.  Mainly because I wanted more light and to see out. At the same time stripped all the berber carpet off the walls and painted whole interior white.  BIG difference having a little cabin nice and bright!
Reply | Threaded
Open this post in threaded view
|

Re: Photo of new hatch boards

ayar
Glenn,

Did you remove the ceiling carpet as well?  Any change in sound insulation or condensation?  I assume the carpet is relatively easy to remove.
Reply | Threaded
Open this post in threaded view
|

Re: Photo of new hatch boards

Lynn Israel
In reply to this post by Glenn Thomson
Glenn, Thanks. A lot of work on the hatch boards. I pulled the sole boards and I hope to have them chemically stripped by a furniture refinishing company, if possible. I have not considered what you have done to the interior but it sounds as if it's a good fit for you. I really like the nautical look of the afromosia wood that is even in our v bearth. That said, I need to add some better lighting by changing out the factory lights and adding led bulbs. Winter is coming and we need more light!!! Lynn
Reply | Threaded
Open this post in threaded view
|

Re: Photo of new hatch boards

John Peter Mitchell
In reply to this post by Glenn Thomson
Hello Glenn,

Did you strip the fore cabin fabric as well as the main cabin?  Could you explain how you painted: primer? top-coat? Which brand of paint? etc.

Would you be able to post pictures of the results?

I removed the badly degraded pockets from the vee-berth area.  That has visually improved that small cabin.  I am tempted to remove the rest of the fabric and would appreciate knowing just what you found underneath your fabric.  Was there any mould?  Was there contact cement which you had to remove?  Was the interior hull side surface rough or smooth?

Cheers, John
Reply | Threaded
Open this post in threaded view
|

Re: Photo of new hatch boards

Glenn Thomson
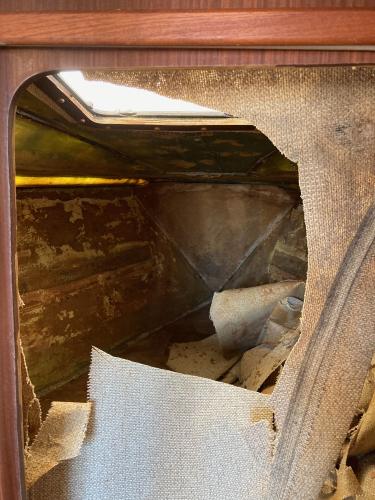
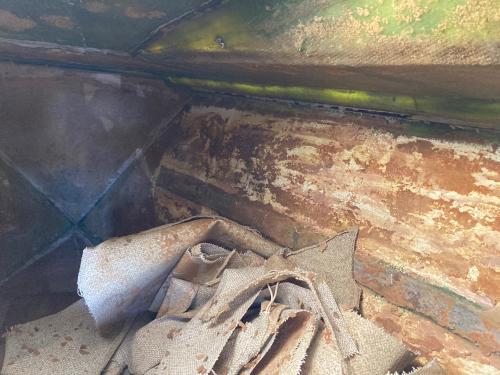
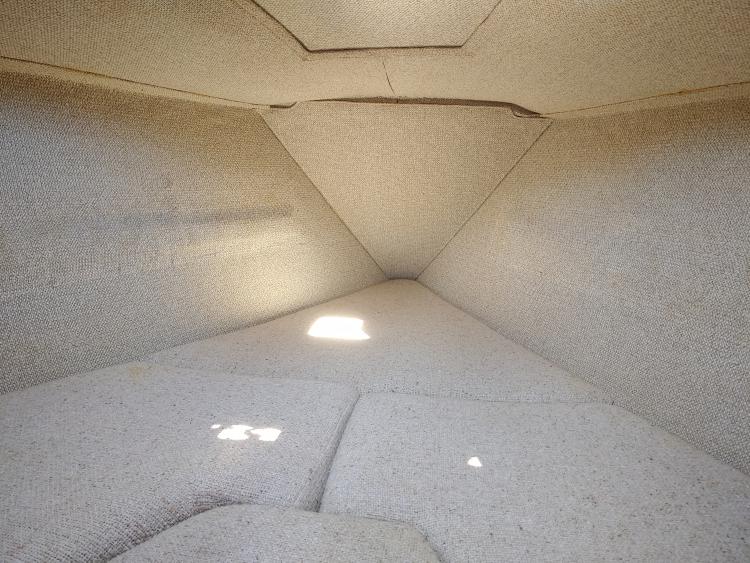
Yes.  I stripped the whole cabin, v-birth, and head.  What motivated me was the fallout of dust, actually the dried up foam backing on the burlap.  And it was bothering our breathing after brushing up against the ceiling.  I am not a perfectionist.  I just wanted a clean dust free environment.  I scraped mostly, with a drag typed paint scraper, the ones with replaceable blades.  Some sanding, grinding, tried some products like acetone and paint stripper but those weren't good use of time. A lot of the carpet would peal off in large pieces, except in and round corners and pockets like around companion opening.  There, I took a 60 grit sander and ground the stuck carpet smooth so that the threads wouldn't be poking out.  

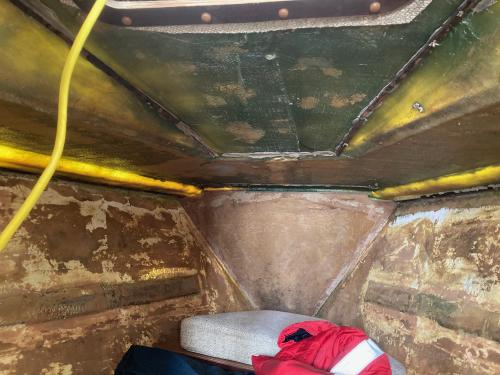
Some of the carpet and lots of the carpet cement was really stuck on!  I did my best smoothing out the ridges of glue.  Then the Sailing season came.  So I got what I think is the best paint, Interlux Brightside white, rolled and brushed on 3 coats.  Super durable coating and thus far really good adhesion.

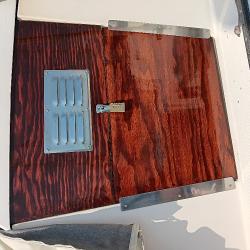
I did away with the wood interior window frames, they're quite damaged by water leaks.  Plus Needed them gone to re- seal the windows.

I'll post a few after photos soon.  I have a few pics during the miserable process.

v birth

Reply | Threaded
Open this post in threaded view
|

Re: Photo of new hatch boards

Glenn Thomson
In reply to this post by ayar
No problem with condensation.  Even the odd time, overnighting with electric heater on in September condensation was light.   What I notice with noise is the slap of a wave or engine noise from another boat very near.  The water transfers sound more profoundly.  I considered a layer of thin insulation rolled out in v-brth covered  with cedar strips horizontal layed,  but not likely going to happen
Reply | Threaded
Open this post in threaded view
|

Re: Photo of new hatch boards

Glenn Thomson
In reply to this post by John Peter Mitchell
A little mould, but at that time the windows leaked some.  I didn't use a primer.  Just the Interlux Brightside.
Reply | Threaded
Open this post in threaded view
|

Re: Photo of new hatch boards

John Peter Mitchell
Hello again Glenn,

Thanks for taking the time to post such a detailed answer to all my questions.  I imagine there must have been a few moments during de-construction that gave you serious pause(?).  However, you laboured onwards and achieved a pleasing result, no doubt.  I hope to see some of your pictures of the finished cabin.  Many of the small lightweight racing sailboats appear to be finished inside with a weight saving paint finish (and some even leave out the paint-Yikes!).

Here is a picture of my boat's vee-berth without the pockets.  I believe this is where I stop: at least, for now...
Reply | Threaded
Open this post in threaded view
|

Re: Photo of new hatch boards

Glenn Thomson
Oh ya.  That is sweet.  i would have left that alone too.  Just that I had too much water ingress from leaky hatch and from both bow cleats that loosened up.  My boat had been let go for about 3 years.  The owner's health was depleting, all he ventured to do was to come to the boat and barbecue once and a while. When I pealed away the v-birth ceiling the cleats were exposed and I could re seal the cleats.  I was surprised to see that the cleats didn't have backing plates, so I inserted a couple of stainless pieces to beef up the strength.  Then I read, I think in the manual that there was  hardwood  sandwiched within the hull where the cleat bolts came through deck.  In any case, those cleats are important as the only fastening point for the anchor or dock lines.