Greetings - New Member - Rigging Specs

classic Classic list List threaded Threaded
6 messages Options
Reply | Threaded
Open this post in threaded view
|

Greetings - New Member - Rigging Specs

David - Moon Chaser
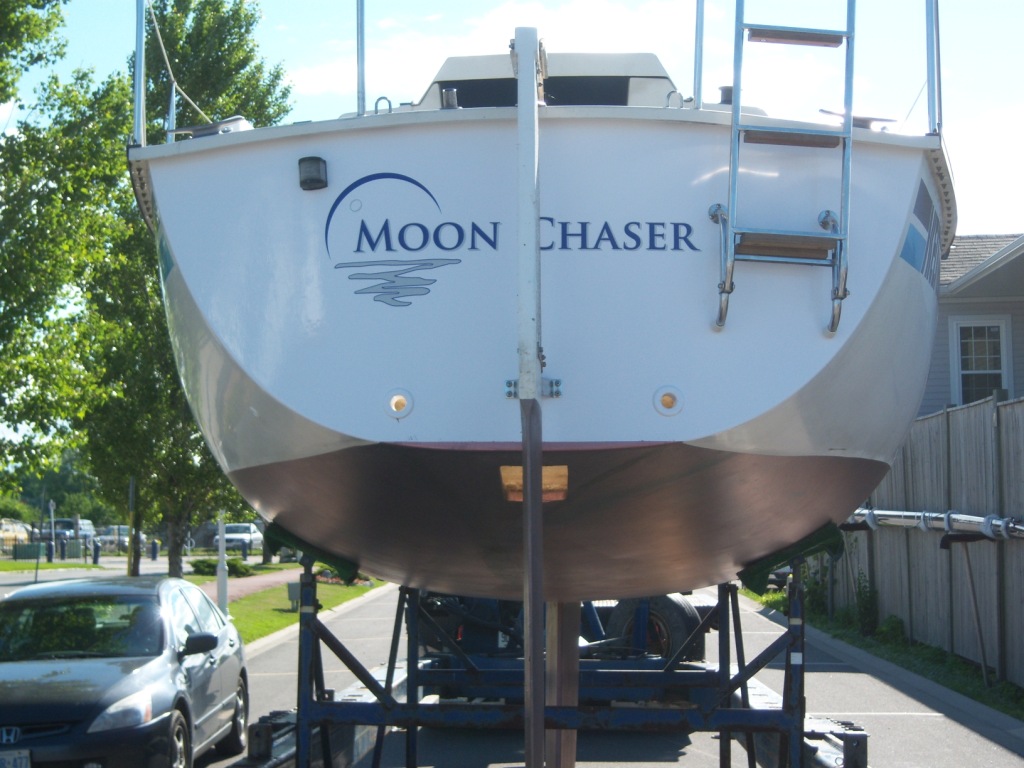
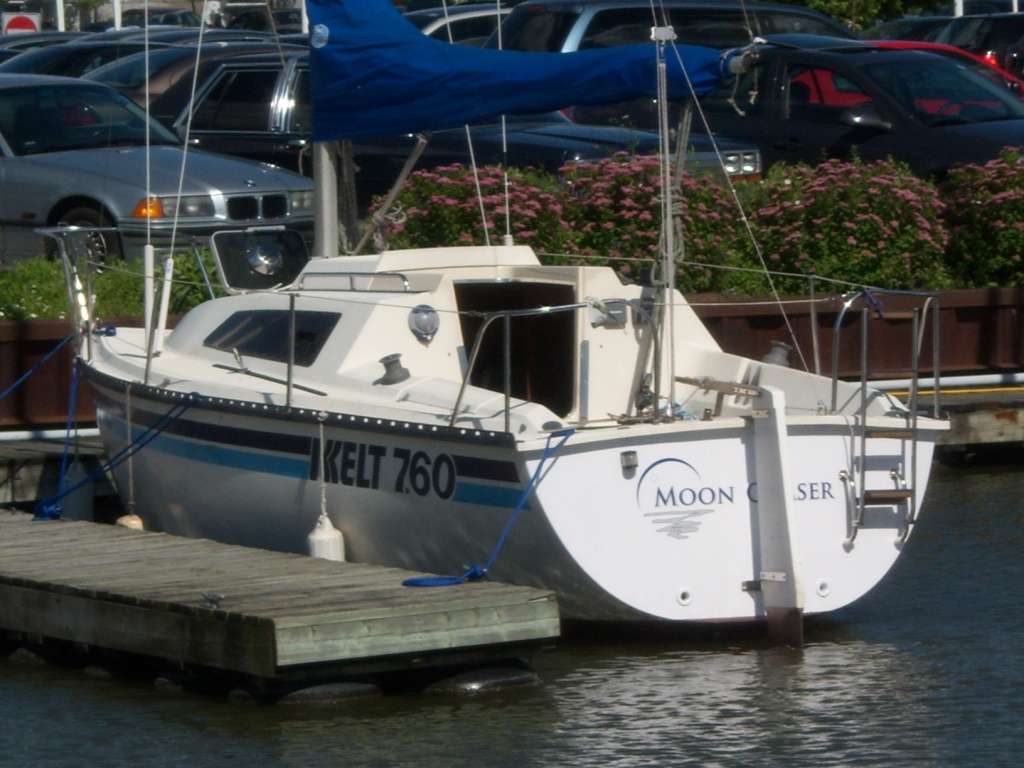
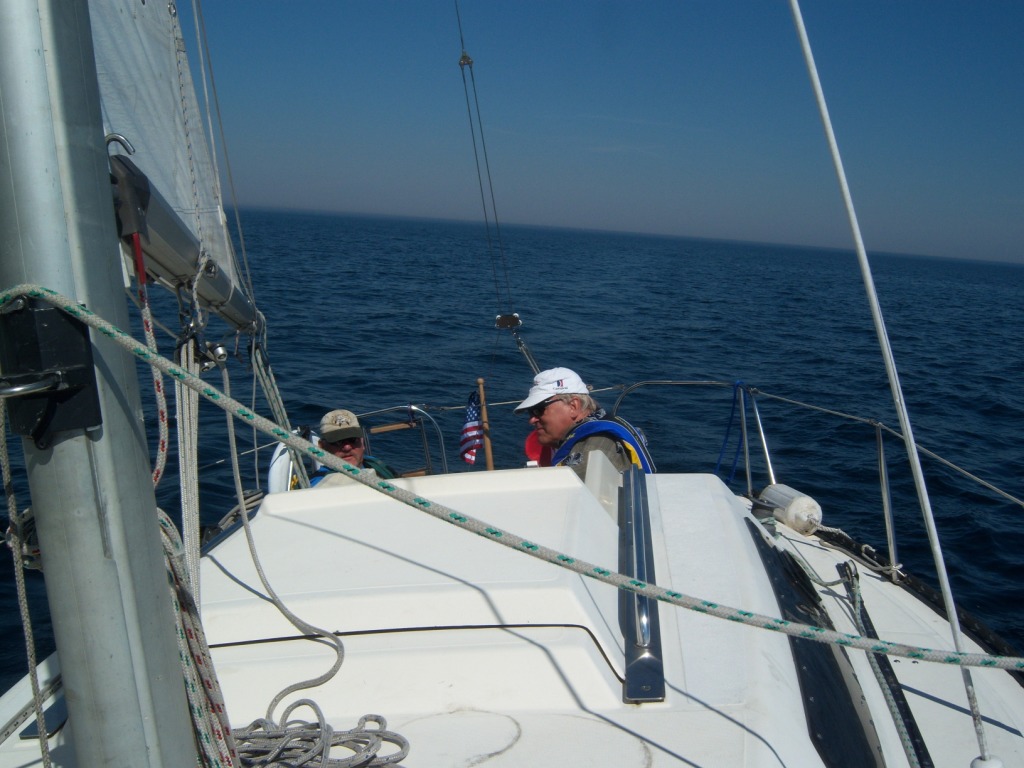
Greetings Mark, et al! - Just discovered your site while garnering specs for a possible used foresail furler.  Thanks for the website effort Mark!  I purchased my 7.60 last November after taking a 4-day CYA Cruising Cert course.  Spent time bringing her up to snuff this spring and launched her on June 30, 2010.  I designed a logo to rename her "Moon Chaser" (Still have to perform a full renaming ceremony/party but did a temp rendering to the gods, just Moon Chaser and me before placing the new name on her stern).  She is docked in Frenchman's Bay, Pickering, Ontario (Lake Ontario).  I did quite a few upgrades before launching (and still working - smile).  Being new to both my Kelt 7.60 and sailing I'll appreciate anything shared (i.e., your winds/sails listing).  She's been out thrice and single-handed her the 3rd time with my girlfriend that has a vision impiarment "manning" the foresail sheets.  I've attached a couple pics and added the rigging specs below from my calculations and the owners manual, if this is helpful for folks.  Good sailing - David

I—distance between top of forestay and the foredeck (Mast height from deck) 30.45ft / 9.28m

J—distance from forestay chainplate to mast
10.16ft / 3.1m

P—distance from boom to top of mast
25.73ft / 7.84m

E—length of boom
9.18ft / 2.8m

Foresail Luff Length (Forestay Length) = 32.10ft / 9.784m [Calculated from manual specs]

Mainsail Area = 282 sq ft / 26.2 sq m
MC-Launch_2_Stern_Shot_on_The_Trailer_Cm.JPGMC-Launch_8_At_Ease_Stern_Cm.JPGMC_1st_Sail_7_Under_Sail_-_Skipper_%26_1st_Mate_Cm.JPG
Reply | Threaded
Open this post in threaded view
|

Re: Greetings - New Member - Rigging Specs

Mark Williamson
Administrator
Thanks for the post David.  Your numbers are interesting.  On the specs page the bridge clearance is 31' but that's obviously wrong (at least it is for yours and i think mine).

I've also been tinkering quite a bit.  I used a 22' extension ladder and climbing harness to service the anchor light.  First trip up I couldn't get the dome off.  Second trip up (the next weekend) I got the dome off but it broke.  Attempted to replace the bulb with an LED but it was a poor fit so took it back.  Third trip up (the next weekend) I replaced the dome (AquaSignal series 25) and put in a new bulb.  I believe there is an LED which will replace the "festoon" type bulb and fit well but I'll need to order it.  The LED I attempted to replace it with was barrel-shaped and the bottom of this unit interfered with the wiring, etc of the anchor light. I'm not in a huge hurry to go back up the mast.

I also cut out the wall to the v-berth, installed a fan in the forward hatch, built a folding table/drink-holder for the binnacle and did various other things (see photos).  I really need to build a bimini, and a set of doors for the entryway would be useful.  It's an almost endless list!
Reply | Threaded
Open this post in threaded view
|

Re: Greetings - New Member - Rigging Specs

David - Moon Chaser
Mark - I agree on the inaccurate 31' bridge clearance.  There's agreement Ive seen on the mast ht as 30.5' and when I losely measured my mast in the rack to estimate for cable length to run new wiring and VHF cable it correlates.  Do you know where the 31'6" from the spec page came from?  I'll have to losely measure from the waterline to the mast bottom so I have an est bridge clearance.

LOL [sorry] at all the mast shimmying.  I ended up replacing my anchor light too.  When re-wiring, I had used the 3% voltage drop table for wire gage size for critical items (figuring navigation lights fit that). I ended up probably over engineering with 14 AWG.  It was too stiff for my existing anchor light spring to push the bulb in.  So, I actually mounted a new pole light to the masthead cap (adding higher bridge clearance, eh).  I actually had a problem with my steaming light.  Theres two small round nuts that fit inside the lens to screw it onto the base.  One fell out forever.  So I used the single screw with a well applied layer of 3M 4000 UV for this season.  I hated to change fixtures as the mast seemed fitted to the light (kinda backwards) with a welded boss base.  May look at adding a combo steam/deck fixture next season, though not sure I want to have a light shining down between me and the bow at night while motoring (Looks like just 1 set of wires for both lights.)

I noticed the v-berth opening on yours.  Just saw that on a new listing and wondered if it was a factory mod.  Guess not, but good job from your pic.  I liked the fan and curious to its details.  This year I replaced instruments w/ transponders; brittle wiring through the cabin, to and up the mast; new portapotty (toilet with separate holding tank on my tentative 2011 to-do list) ;  painted the transom and applied my new logo; about to replace the radio; oiled the interior teak last night, had to replace the head sink foot-pump, etc etc.  And no job is simple and always having to fix the previous owner's sub-par work.  Even the transponder holes were too large and in the wrong place.  But I love it.  

I also hope to bring the LPG tank locker up to regulations this year (adding a sealed door, new regulator with gauge, inside T for future BBQ.  I actually already added a bottom drain to the locker running it to a new above waterline thruhull before launching so that was done).  Lots to figure out too, like how the 3-coloured main reefing system works.  Foresail furler hoped for for next year.  

BTW:  When looking for that bridge clearance spec, I glanced through the original owner's manual and there are some interesting tid-bits in there.  Like a detailed sail trim section with corresponding wind speeds.  Do you have a copy of it?

Regards - David
Reply | Threaded
Open this post in threaded view
|

Re: Greetings - New Member - Rigging Specs

Mark Williamson
Administrator
Can't remember where the bridge clearance figure came from but sounds like I better remove it.  

The fan is a battery powered desk fan that is screwed to a piece of wood.  The wood is attached via hinges and latch to the edge of the hatchway and can be folded up or down.  It is also wired to the battery via the light in the v-berth.  I'll post some more photos if I can find them.

I've been curious about the three lines running from the mast on the port side.  One I believe is the outhaul but it appears to be bound up in the boom.  Another connects to several pulleys but isn't connected to anything else.  Don't recall where the third goes but don't think it does anything.  My guess was that the two extra lines were for reefing but not exactly sure how they ran.  It'd be nice to set them up for reefing.

I haven't seen the original manual.  If you can PDF i wouldn't mind seeing it and possibly linking it to the site.
Reply | Threaded
Open this post in threaded view
|

Re: Greetings - New Member - Rigging Specs

David - Moon Chaser
Mark - NP on sending the owner's maual.  I also have the brochure with all pages in one file which I will send.  (I'll send those to your email address too as requested in one of your posts re sending pics.)  The manual has a section on the reefing system which I begin to follow when reading, then lose it midway.  I believe this is the system you are wondering about too.  Will look at it on the boat with manual in hand to work out how the system works.  I see now that your fan (I think) is attached to the v-berth side of the bulkhead.  Originally I thought it was actually hinged to the aft end of the hatch frame, allowing it to either swing down into the cabin, or up creating outside air ventilation.  I have a few other comments/questions related to your photos and upgrades/projects.  Maybe better to create a new string for those, another with the attachments, and another re the reefing system.  This way maybe others can join in per string as interested.  Thanks again! - David
 
PS:  Still trying to figure out the Forum dynamics, incldg attaching vs. embedding a file.  I did see my embedded pics were too large, so I can pair any future ones down.  I'm replying to this directly from my email box to see if that makes it to the Forum.  Also, the Forum only seems to email me a direct response to my original post, vs. keeping the string going to me via email.  Hmmmm . . .  

On Wed, Jul 28, 2010 at 9:48 PM, Mark Williamson [via Kelt Sailboat Forum] <[hidden email]> wrote:
Can't remember where the bridge clearance figure came from but sounds like I better remove it.  

The fan is a battery powered desk fan that is screwed to a piece of wood.  The wood is attached via hinges and latch to the edge of the hatchway and can be folded up or down.  It is also wired to the battery via the light in the v-berth.  I'll post some more photos if I can find them.

I've been curious about the three lines running from the mast on the port side.  One I believe is the outhaul but it appears to be bound up in the boom.  Another connects to several pulleys but isn't connected to anything else.  Don't recall where the third goes but don't think it does anything.  My guess was that the two extra lines were for reefing but not exactly sure how they ran.  It'd be nice to set them up for reefing.

I haven't seen the original manual.  If you can PDF i wouldn't mind seeing it and possibly linking it to the site.


View message @ http://kelt-sailboat-forum.3990426.n2.nabble.com/Greetings-New-Member-Rigging-Specs-tp5339270p5346722.html
To unsubscribe from Re: Greetings - New Member - Rigging Specs, click here.


Reply | Threaded
Open this post in threaded view
|

Re: Greetings - New Member - Rigging Specs

Mark Williamson
Administrator
I uploaded some more photos of the fan to the PHOTOS section.  It does indeed swing up or down.  I also uploaded a photo of a kelt which appears to have a "fully" cutout v-berth.  Looks really nice but would be difficult to do.  I used a jigsaw for mine.  Thanks for uploading the owners manual.  Looks like it will solve the mystery of the reefing lines.